Swing Arms
Before you start debur and wire brush all the metal pieces.
The critical issue with the swing arms is wheel alignment. Leave all the welds until last and simply tack everything. Warping from the heat effected zone and weld beads is also a potential hazard because it can pull a perfectly square setup out of alignment.
Here is what the finished swing arms look like. The one on the right still has the sacrificial bearings in it that were used to reduce warping during welding.
Don't cut the swing arms as separate pieces, instead cut a single section of 35mm x 35mm SHS that is 760mm long.
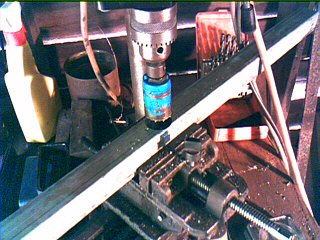
Using a 30mm hole saw (or better 32mm if you have one), cut a hole right through the center. Then using a hack saw, cut this piece in two. You may have to use the angle grinder just lightly on the ends to fit them to the pivot bearing houses.
The swing arm tie rod elbows are constructed in much the same way, however it is important that they are as symmetrical as possible, so shaping them as a group is a good idea. Here I am using the swing arm pivot the make minor corrections with the grinder to ensure that they are square and true.
After center punching, here I am drilling out the hole for the rod end mounts.
These are machined much like the rocker arm. Here we see the finished pieces.
For the bushes, start by center punching 35mm lengths of 20mm round.
Here I am using a mini-square to make sure that the round is sitting square in the XY vice. At this stage I am only drilling a pilot hole, only when the bushes are welded onto the swing arms should you drill and ream them out to fit the 14mm axles.
Here are the bushes with the pilot holes pushed into Item 23 of the swing arms.
Next you run weld bed around the perimeter of the bush, making sure to use an 85° weld angle to ensure good penetration. When you are done, grind the weld bead flat, then using the pilot holes as a guide, drill out the M14 holes for the rear axles.
The next job is to assemble the swing arms (Items 21, 22 & 23). These should only be tacked together at this stage. Make sure they are square with with your work bench. Here I am clamping Items 22 & 23 to a 45° bit of scrap C channel that I have for just this purpose.
Here comes the really challenging part. We need to tack weld the swing arm to the pivot, and the wheel must be properly aligned. The first thing you need to do is square up and level your frame to your work bench. Then you need to chock the swing arm so you can clamp it, but also so you can add shims where needed to align it properly.
Here I have several large pieces of scrap C channel that I will use to align and clamp the swing arm before I tack weld it.
To do the alignment I bolt on the wheel and measure from the edge of the rim to the table, front and back. These all should be equal. Then using a large square I also check the top of the rim with the table. This should also be equal to the first measurements. Adjust and re-clamp as necessary until you have the wheel aligned. Then remove the wheel without bumping anything and tack weld the swing arm to the pivot. Unclamp it and swing it forward so you can tack weld it on the opposite side. Now swing it back and put the wheel back on and recheck all your measurements. If everything is OK, you can start welding everything together. Start with the top and bottom of each weld and then to do the sides, doing half the weld at a time.
The next thing to add is Item 20. Put one of your sacrificial bearings on the inside of each swing arm, then slide a ½" bolt between them and clamp them so they sit flush with each other. Now place the swing arms on your work bench so they are level and clamp the two Item 20 couplers to each other with something flat so they are flush with each other. Tack weld, check your alignment and weld.
The last thing to do is to weld the end cap on the other end. Grind them square, with a slight bevel when you are done.
After assembling the frame I checked the alignment of the back wheels. Center to center they are 715mm (so the track is off spec by 15mm -- big deal), but the alignment is perfect. Front to back is is out by at most 1mm. Which is fine by me. Top to bottom is out by about 2mm, the top being wider than the bottom, but my guess is that when I sit on it, the small flex in the swing arms will probably mean that it is actually level.
Copyright © 2007 Henry Thomas
![]()


